Publish to GooglePlay
This section describes how to release and publish the Android application to GooglePlay store.
important
Since XStore was published to Google Play, the package name is signed by us so it's important that you change the App name, Package name and App icon before publishing the app. Or your submission may be rejected by Google.
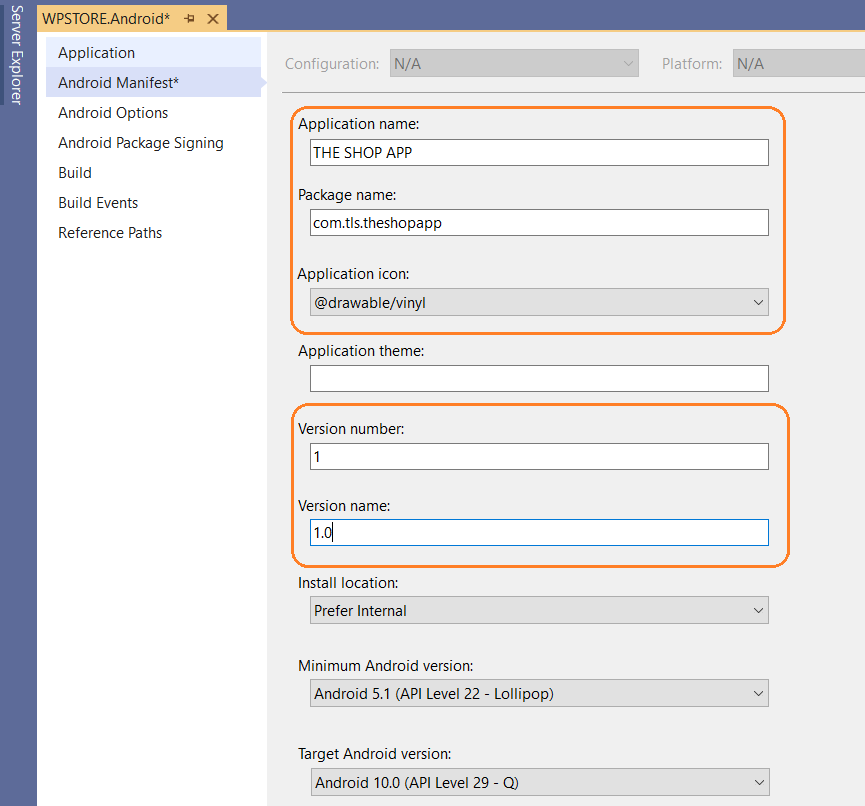
1. Change App icon, app name and package name.
In Android, app icon, name and package name is defined in Manifest file, please right click on Android project and choose Properties > Android Manifest to place your change.
One more step, since the app defined SplashActivity as main launcher, you need to repeat the changes for icon and app name to this SplashActivity.cs file:
Version the Application
Versioning is important for Android application maintenance and distribution. Without some sort of versioning in place, it is difficult to determine if or how an application should be updated.
Version Number – Enter an integer value (used internally by Android and the application) to represents the version of the application. . This value has no relationship or affinity with the version name attribute (see below). Applications and publishing services should not display this value to users. This value is stored in the AndroidManifest.xml file as android:versionCode.
Version Name – Enter a string that is used only for communicating information to the user about the version of the application (as installed on a specific device). The version name is intended to be displayed to users or in Google Play. This value is stored in the AndroidManifest.xml file as android:versionName.
2. Compile and Archive for Publishing
- Step 1. Compile:
After all of the above steps are completed, the app is ready for compilation. Firstly change the Solution Configurations to Release mode, then select Build > Rebuild Solution, verify that it builds successfully. Note that this step does not yet produce an APK.
- Step 2. Archive:
2.1 For Windows
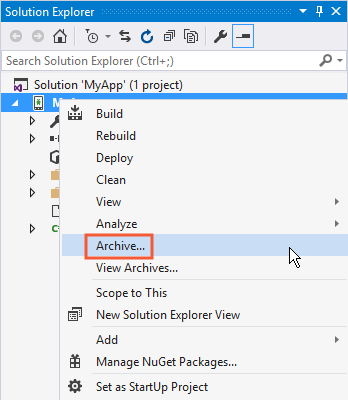
To begin the publishing process, right-click the project in Solution Explorer and select the Archive... context menu item:
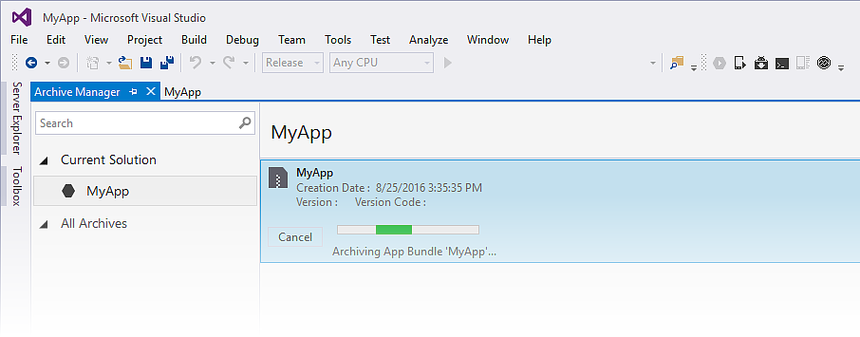
Archive... launches the Archive Manager and begins the process of archiving the App bundle as shown in this screenshot:
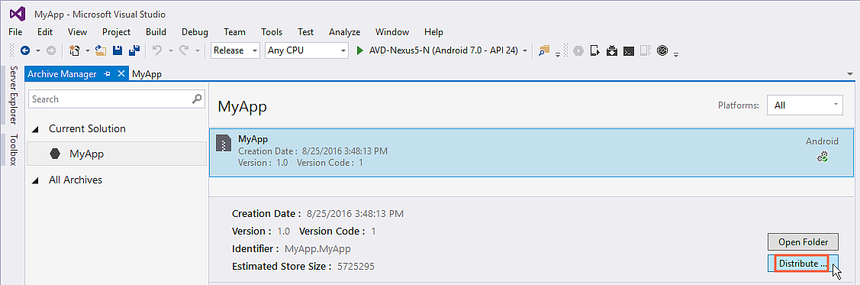
When the archived version of the application is done, select the archived in the Archive Manager and click the Distribute... button:
The Distribution Channel dialog shows information about the app, an indication of distribution workflow progress, and a choice of distribution channels. On the first run, two choices are presented:
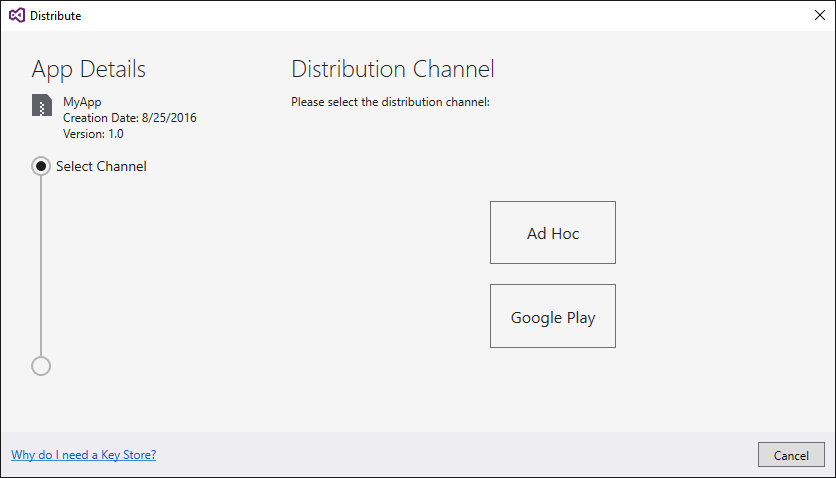
Choose Ad-Hoc if you want to generate a signed APK that can be sideloaded to Android devices. Refer to Generate a signed APK for the detail instructions.
Choose Google-Play to publishes a signed APK to Google Play. Refer to Publish to Google Play for the detail instructions.
2.2 For Mac
To begin the publishing process, select Build > Archive for Publishing:

Archive for Publishing builds the project and bundles it into an archive file. The Archive All menu choice archives all archivable projects in the solution. Both options automatically open the Archive Manager when the build and bundling operations complete:
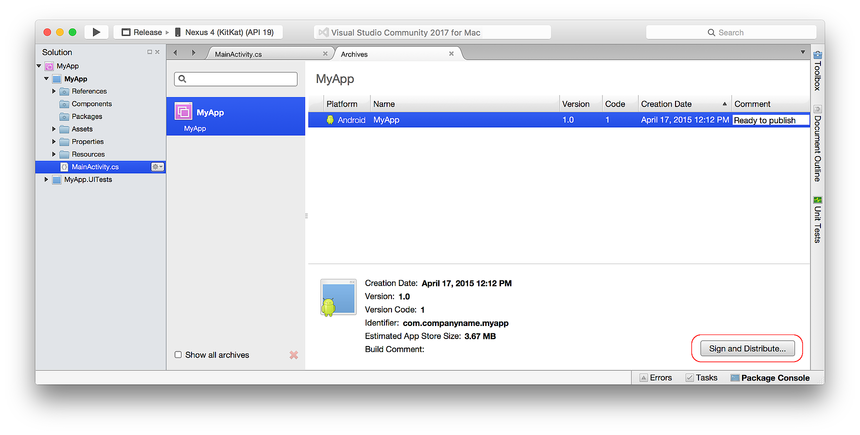
In this example, the Archive Manager lists only one archived application, MyApp. Notice that the comment field allows a short comment to be saved with the archive. To publish an archived version of a Xamarin.Android application, select the app in the Archive Manager and click Sign and Distribute... as shown above. The resulting Sign and Distribute dialog presents two choices:
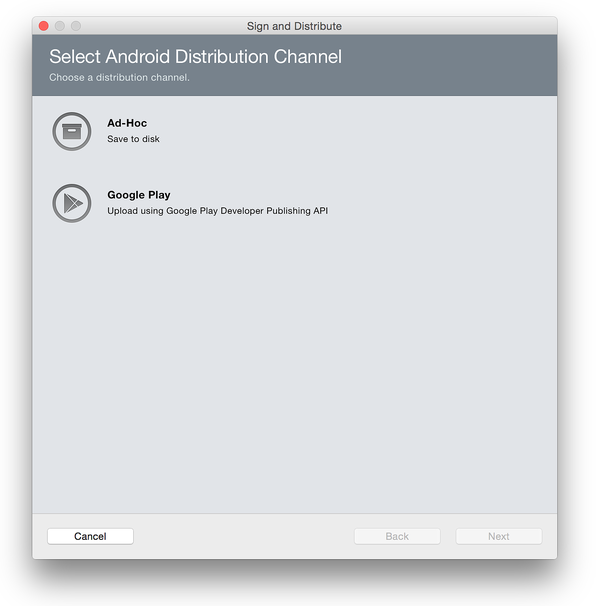
Choose Ad-Hoc if you want to generate a signed APK that can be sideloaded to Android devices. Refer to Generate a signed APK for the detail instructions.
Choose Google-Play to publishes a signed APK to Google Play. Refer to Publish to Google Play for the detail instructions.
3. Generate a signed APK
3.1 For Windows
Step 1. Create a New Certificate
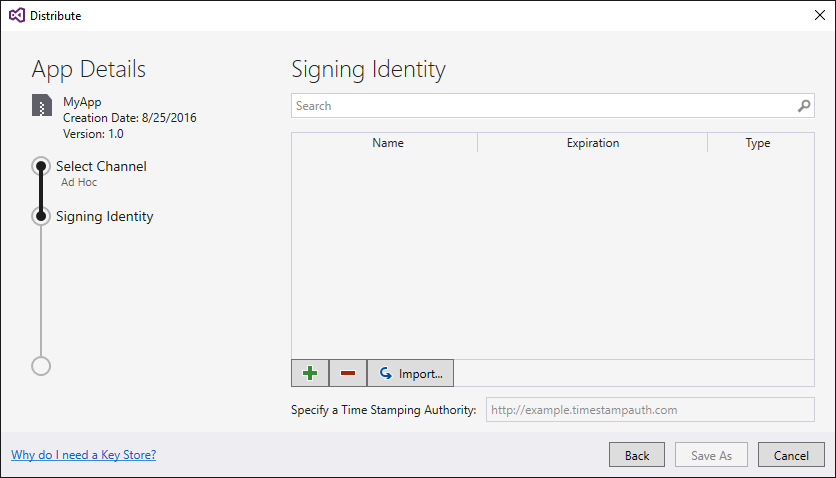
After Ad-Hoc is selected, Visual Studio opens the Signing Identity page of the dialog as shown in the next screenshot. To publish the .APK, it must first be signed with a signing key (also referred to as a certificate).
If you have an existing certificate, click the Import button and then proceeding to Sign the APK. Otherwise, click the click the + button to create a new certificate:
The Create Android Key Store dialog is displayed; use this dialog to create a new signing certificate that can use for signing Android applications. Enter the required information (outlined in red) as shown in this dialog:
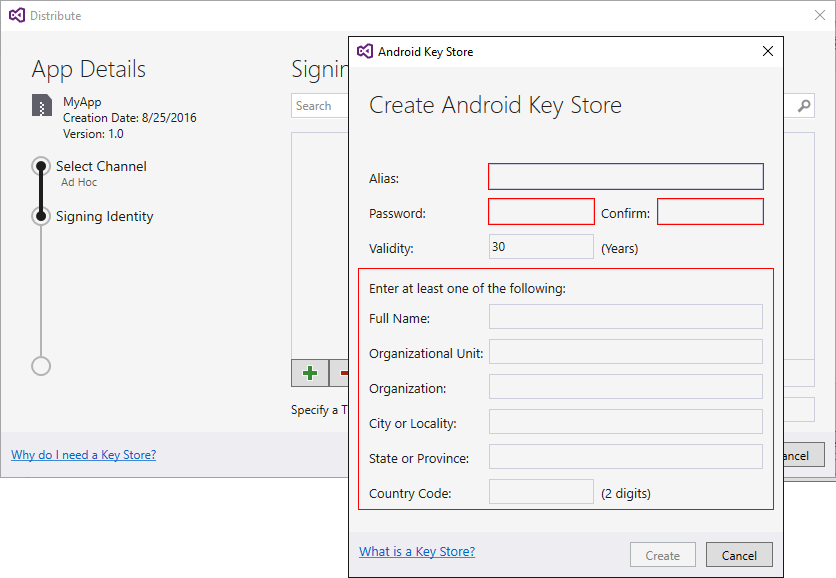
Fill your key info the all required fields then click Create button to complete the creation.
The resulting keystore resides in the following location:
C:\Users\USERNAME\AppData\Local\Xamarin\Mono for Android\Keystore\ALIAS\ALIAS.keystore
For example, using chimp as the alias, the above steps would create a new signing key in the following location:
C:\Users\USERNAME\AppData\Local\Xamarin\Mono for Android\Keystore\chimp\chimp.keystore
note
Be sure to back up the resulting keystore file and password in a safe place – it is not included in the Solution. If you lose your keystore file (for example, because you moved to another computer or reinstalled Windows), you will be unable to sign your app with the same certificate as previous versions.
Step 2. Sign the APK
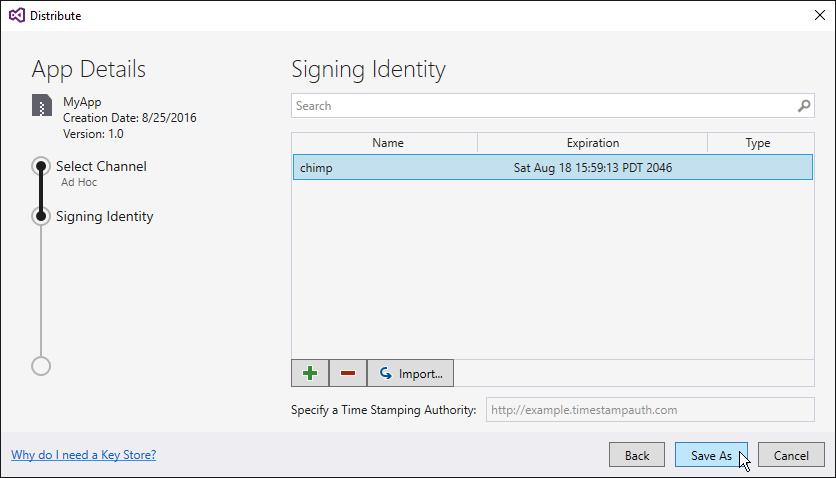
When Create is clicked, a new key store (containing a new certificate) will be saved and listed under Signing Identity as shown in the next screenshot. To publish ad-hoc, select the signing identity to use for signing and click Save As to publish the app for independent distribution. For example, the chimp signing identity (created earlier) is selected in this screenshot:
Next, the Archive Manager displays the publishing progress. When the publishing process completes, the Save As dialog opens to ask for a location where the generated .APK file is to be stored:
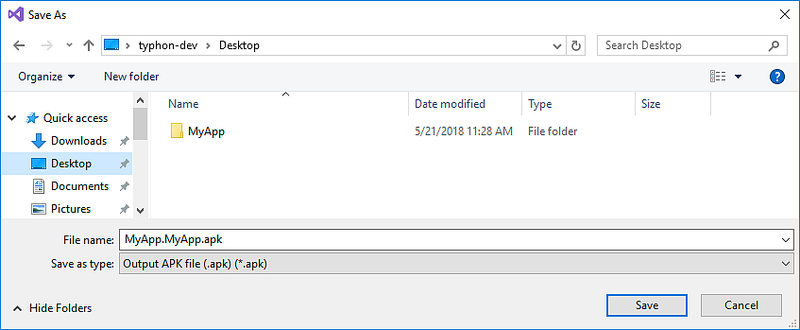
Navigate to the desired location and click Save. If the key password is unknown, the Signing Password dialog will appear to prompt for the password for the selected certificate:
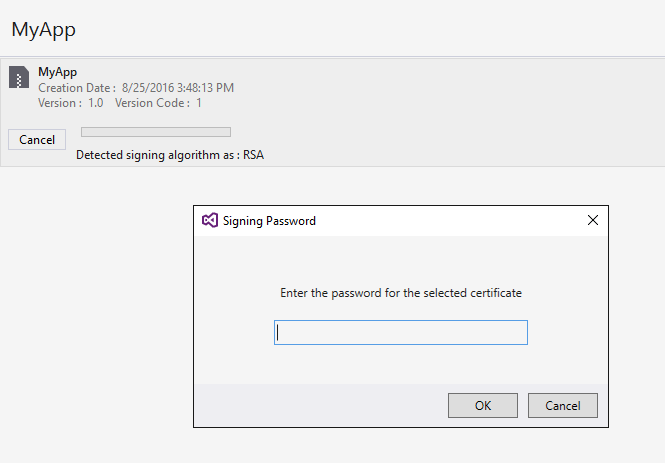
Enter the password to signing process, then click Open Distribution, you will see the signed apk is generated.
3.2 For Mac
Step 1. Create a New Certificate
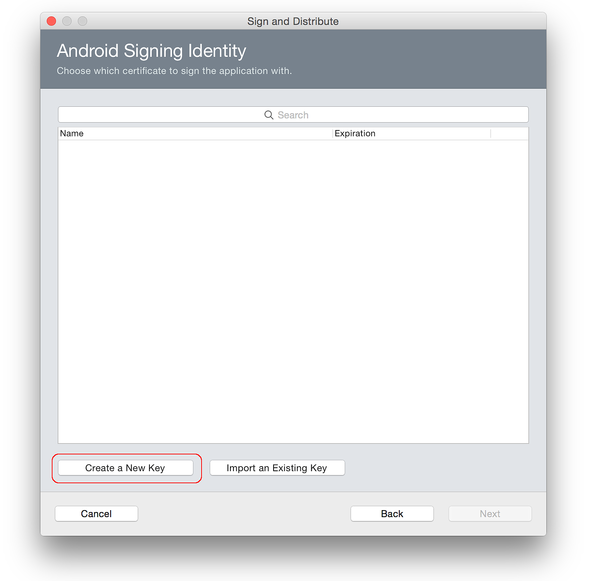
After clicking Ad-Hoc, Visual Studio for Mac opens the Android Signing Identity dialog as shown in the next screenshot. To publish the .APK, it must first be signed it with a signing key (also referred to as a certificate). If a certificate already exists, click the Import an Existing Key button to import it and then proceeding to Sign the APK. Otherwise, click the Create a New Key button to create a new certificate:
The Create New Certificate dialog is used to create a new signing certificate that can be used for signing Android applications. Click OK after entering in the necessary information:
The resulting keystore resides in the following location:
~/Library/Developer/Xamarin/Keystore/alias/alias.keystore
For example, the above steps might create a new signing key in the following location:
~/Library/Developer/Xamarin/Keystore/chimp/chimp.keystore
note
Be sure to back up the resulting keystore file and password in a safe place – it is not included in the Solution. If you lose your keystore file (for example, because you moved to another computer or reinstalled macOS), you will be unable to sign your app with the same certificate as previous versions.
Step 2. Sign the APK
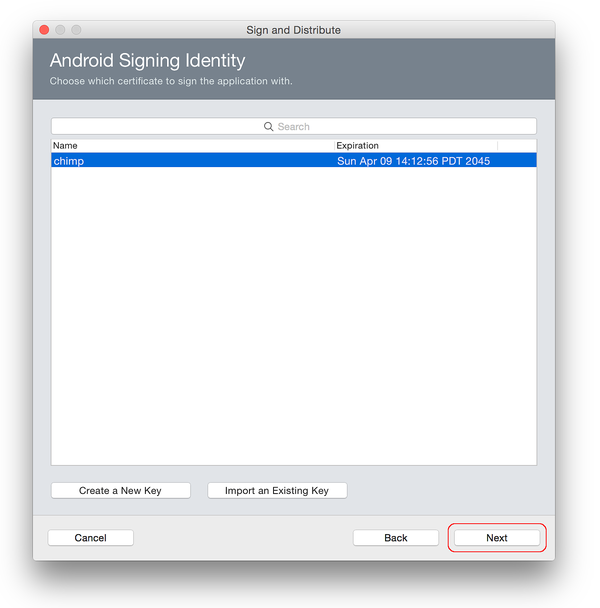
As seen here, a new certificate was added to the key store. Click Next to publish the app ad-hoc (for independent distribution) as shown in this example:
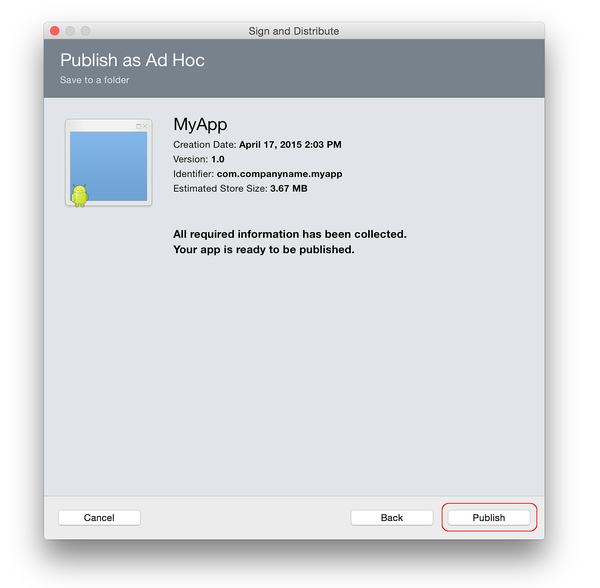
The Publish as Ad Hoc dialog provides a summary of the signed app before it is published. If this information is correct, click Publish.
The Output APK file dialog will save the APK to the path specified. Click Save.
Next, enter the password for the certificate (the password that was used in the Create New Certificate dialog) and click OK,
The APK is signed with the certificate and saved to the specified location. Click Reveal in Finder, the APK is ready to copy from the finder and send to its final destination.
Next steps
After the application package has been signed for release, it must be published. The following sections describe several ways to publish an application.
4. Publish to Google Play
This section guide the way manually uploading the APK file to Google Play through Google Play Developer Console
4.1 Requirements
To publish applications on Google play, it is necessary to have a publisher account. To sign up for a publisher account follow these steps:
- Visit the Google Play Developer Console.
- Enter basic information about your developer identity.
- Read and accept the Developer Distribution Agreement for your locale.
- Pay the $25 USD registration fee.
- Confirm verification by e-mail.
- After the account has been created, it is possible to publish applications using Google Play.
4.2 Preparing Promotional Assets
To effectively promote and advertise an application on Google Play, Google allows developers to submit promotional assets such as screenshots, graphics, and video to be submitted. Google Play will then use those assets to advertise and promote the application.
Launcher Icons A launcher icon is a graphic that represents an application. Each launcher icon should be a 32-bit PNG with an alpha channel for transparency. An application should have icons for all of the generalized screen densities as outlined in the list below:
- ldpi (120dpi) – 36 x 36 px
- mdpi (160dpi) – 48 x 48 px
- hdpi (240dpi) – 72 x 72 px
- xhdpi (320dpi) – 96 x 96 px
Launcher icons are the first things that a user will see of applications on Google Play, so care should be taken to make the launcher icons visually appealing and meaningful.
Tips for Launcher Icons:
Simple and uncluttered – Launcher icons should be kept simple and uncluttered. This means excluding the name of the application from the icon. Simpler icons will be more memorable, and will be easier to distinguish at the smaller sizes.
Icons should not be thin – Overly thin icons will not stand out well on all backgrounds.
Use the alpha channel – Icons should make use of the alpha channel, and should not be full-framed images.
High Resolution Application Icons:
Applications on Google Play require a high fidelity version of the application icon. It is only used by Google Play, and does not replace the application launcher icon. The specifications for the high-resolution icon are:
- 32-bit PNG with an alpha channel
- 512 x 512 pixels
- Maximum size of 1024KB
tip
The Android Asset Studio is a helpful tool for creating suitable launcher icons and the high-resolution application icon.
Screenshots:
Google play requires a minimum of two and a maximum of eight screenshots for an application. They will be displayed on an application's details page in Google Play.
The specs for screenshots are:
- 24 bit PNG or JPG with no alpha channel
- 320w x 480h or 480w x 800h or 480w x 854h. Landscaped images will be cropped.
Promotional Graphic This is an optional image used by Google Play:
- It is a 180w x 120h 24 bit PNG or JPG with no alpha channel.
- No border in art.
Feature Graphic
Used by the featured section of Google Play. This graphic may be displayed alone without an application icon.
- 1024w x 500h PNG or JPG with no alpha channel and no transparency.
- All of the important content should be within a frame of 924x500. Pixels outside of this frame may be cropped for stylistic purposes.
- This graphic may be scaled down: use large text and keep graphics simple.
Video Link This is a URL to a YouTube video showcasing the application. The video should be 30 seconds to 2 minutes in length and showcase the best parts of your application.
4.3 Publishing to Google Play
Once the APK has been compiled and the promotional assets prepared, the application is ready to upload to Google Play
...content to be continue update...